
Caroline’s Fifteenth Birthday Party
Author’s note: I’m writing this trapped in our bedroom watching a movie I owe Alex in return for his watching Crossing Delancey while teenagers control the rest of our entire house (backyard, kitchen, living room, dining room, and the entire upstairs). I’m also terrified that teens, barbecue and my new white couch were a bad idea. When I quietly suggested to Caroline that maybe barbecue wasn’t allowed on the couch, she politely rolled her eyes.
Strangely, our girls aren’t really into big birthday parties. Maybe it’s because they both have August birthdays and are resigned to the fact that everyone is making a final vacation push, or it’s their form of rebellion I’m not really sure. Whatever the reason, big teen parties haven’t really been a thing around here. Add to that unless you’re hosting a quinceañera (which we are not) 15 isn’t really a big party year.

At one point, Caroline had mentioned copying Shan’s Heather’s party. But, she’s 15 and plays tennis. How can we not lean into that big time?*** While Caroline might play tennis most of her friends don’t, which means a round robin tournament isn’t going to work. With the concept of playing tennis off the table, we still considered having a party on the tennis courts. Conceptually, this seemed great. However, it posed a lot of logistical questions including actually finding a place willing to give up a couple of courts, figuring out catering and the limitation on the shoes they could wear. We nixed that idea and decided to go with our old standby of having it at home. (if it’s good enough for adults it should be good enough for the teen set, right?)
This meant our challenge was: How do we bring the tennis theme into the house in a way that even non tennis players would appreciate? We decided to combine our tennis theme with the Instagrammer background concept (after all Caroline has been taking selfies for most of her life).


Once we had the general theme/concept in place we needed to come up with a plan that would allow for a fun safe environment that once started would require minimum parental involvement. Let’s face it, even the best of kids don’t want their awesome and cool parents hanging around when their friends are over. We started with the menu, and I don’t disagree that pizza or hamburgers would be perfectly acceptable for this style of party. This was Caroline’s party, and the menu was entirely (with veto power from us) up to her. After a trip to Ham’s Orchard to pick up peaches in early July, Caroline decided that she wanted peach pulled pork and brisket with homemade buns. With barbecue as the base, she originally just thought standard barbecue faire, coleslaw, potato salad, and baked beans. She also wanted pimento cheese as an appetizer (she really is a Southern girl). After talking about it, it turns out that Caroline doesn’t really like potato salad and wasn’t really sure that coleslaw and baked beans were the way to go. Ultimately, she decided to replace the heavy sides with chips, and beef up the appetizer side of things. We added deviled eggs (a favorite of several of her friends), homemade pretzels with queso, and the standard fruit and veggie trays with dip.


Of course, we didn’t forget dessert. She opted for a lemon cake, vanilla cupcakes and an assortment of cookies. The beauty of this menu was that once everything was made and set out, it was a simple buffet style that didn’t require adults to man a grill or generally be in their way.


Caroline was actually pretty set in what she wanted the buffet to look like. She really liked what we had done for Shannon’s graduation party, where everything was in one space on different levels, but she wanted it in the kitchen. Unfortunately, there just wasn’t enough room on the kitchen bar, so we ended up with appetizers and dinner in the kitchen and dessert in the dining room. From what I’ve seen based on Caroline’s Halloween party last year, and the amount of desserts left over this year, having food in a room that is not the key space of activity doesn’t work. Even though the dining room was a few feet from the action, they tend to forget it’s there and whatever food is in there goes largely unnoticed.


As I noted earlier, we decided to bring in the “Instagram” style backdrop concept to serve a dual purpose as decorations and activity. Our first bit of inspiration came from all of the “grass” backdrops that are at every event hoping to find its way onto a wayward contestant on The Bachelor’s instagram feed. Rather than go with grass and words to inspire us all like “Live, Laugh, Love,” we thought something along the lines of a giant tennis ball was in order. We could have easily painted a sheet and created a backdrop more in line with what we’ve used for other parties, but we wanted the texture that the grass backdrop creates. We decided to accomplish this by using chicken wire and hand colored coffee filters.

We started with the revamped backdrop frame that we use at most of our parties. (Here’s a link to how we’ve used it in the past.) Next, we stapled chicken wire that covered the entire length of the frame. Creating the backdrop on the frame gave it more of a three dimensional look, and limited to the holes in the wall, to the 2 that are semi permanent from using the backdrop almost every year.
Once the frame was built we were ready to add the dyed coffee filters. Dying the filters is really easy, but it can be time consuming. If you look on Pinterest you will find a ton of ways to do this, and many are super complicated. If you’re making something really intricate and small, I would suggest looking into those methods, but if you’re doing a mostly single color backdrop, simple is better. I took a large jelly roll pan, filled it half way or so with water and then dropped a pretty large amount (I measured it the same way I do bubble bath; I just dumped a bunch in and said that seems good) of yellow food coloring into it. At first, I was just dropping in one or two filters at a time. I realized pretty quickly that I could actually drop in a couple of stacks of 10 or so of filters at a time, and they absorbed the dye as well as separating each of them. I’d leave the filters in the water for about 10 seconds or so. Then I’d wring them out just like a washcloth, flatten them and stack them on a cookie sheet. After I dyed a pack of 200, I’d toss them in the drier for about 30 minutes. Once they were dry it was really easy to separate the stacks that had been dyed together.
One thing I found was the food coloring varied greatly between brands. I started with McCormick, but when I went to replace it all we could find was the store brands. The Walmart tended to be a bit lighter and almost seem tan. We got closer to the McCormick bright yellow with the Kroger store brand. I was okay with the variation in color, but it was really important that we spread the different yellows out across the backdrop, otherwise we ended up with giant patches of different yellows. If you really want to make sure that you have all of one color, then definitely plan in advance and buy plenty of food coloring. This project is roughly the size of a King sized sheet, it used about 3000 coffee filters and 4 bottles of standard food coloring. We worked on it over the course of 3 days. It wasn’t 8 hours a day each day, but it was a good chunk of time. I would say this was a cheap, but time consuming project. You definitely want to plan accordingly. As a side note, we didn’t glue the coffee filters into the chicken wire. This worked out well for us, because we ended up changing the traditional tennis ball design into a modified heart. But, if you are going to create a backdrop that is going to get a lot of use or even something like a float, I would definitely come up with a way to secure the filters.

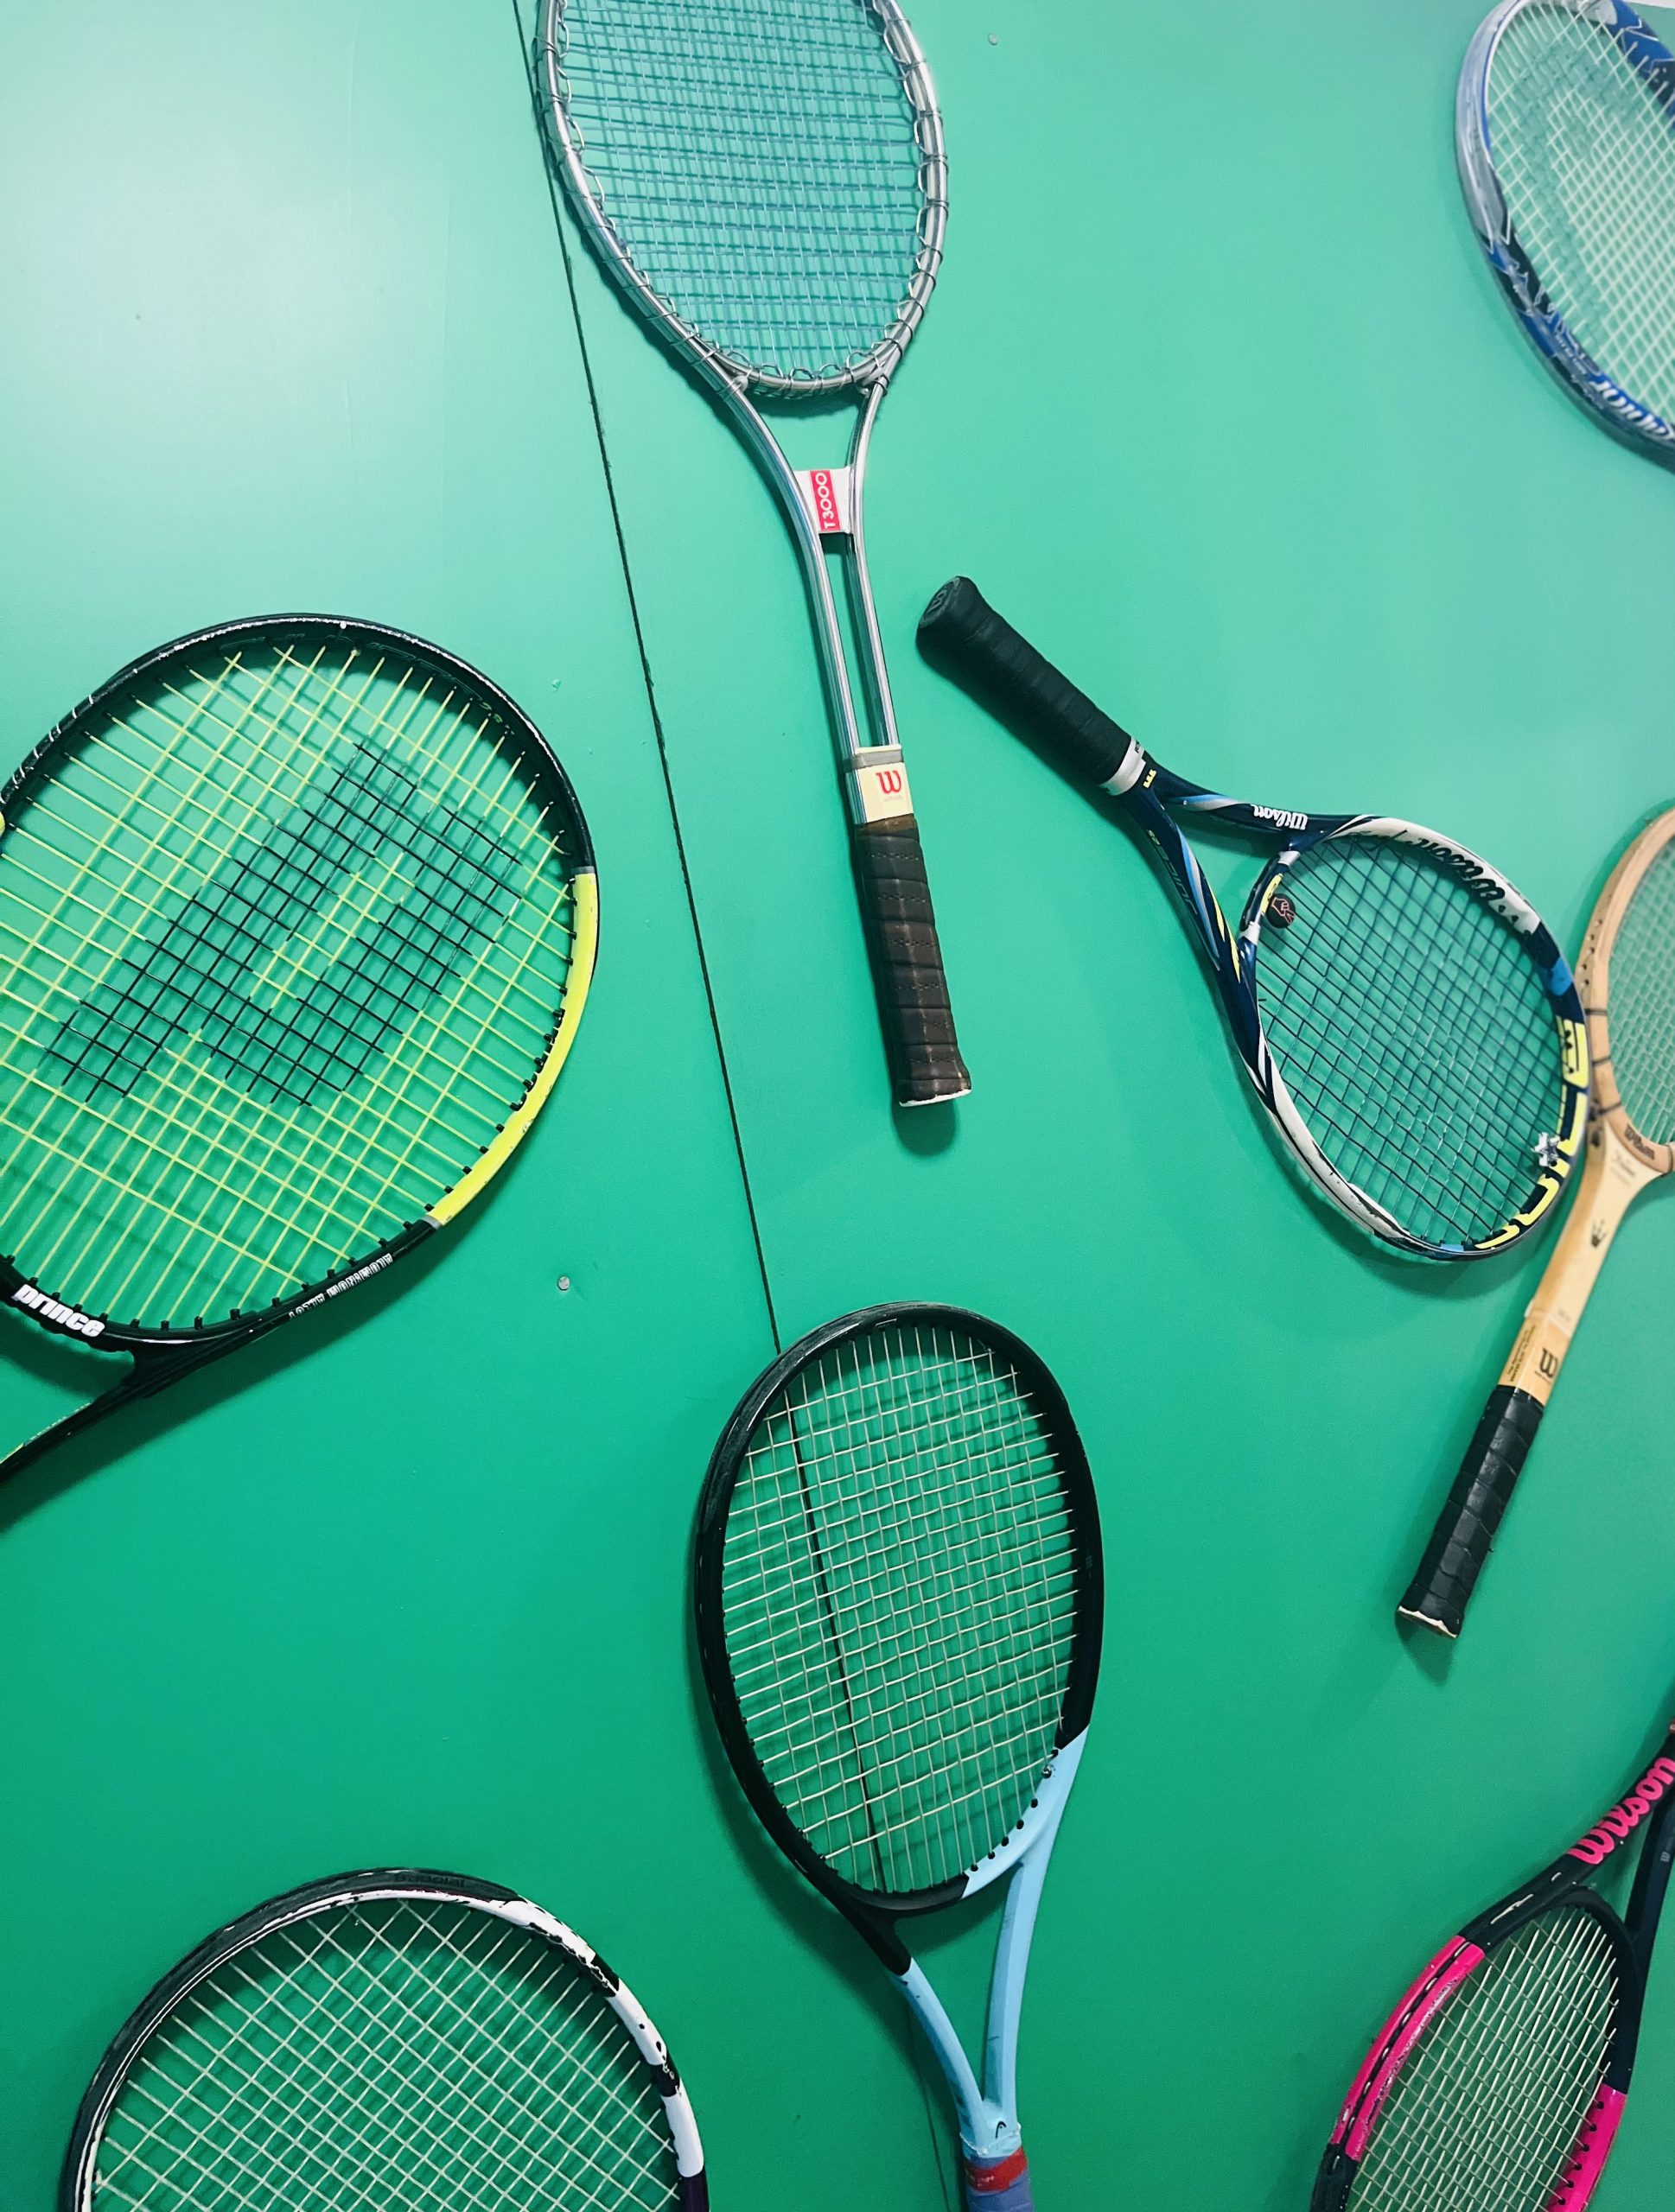
The second backdrop was significantly quicker and easier. We thought it would be fun to feature tennis racquets from different time periods. Overall, we weren’t too worried about a specific variety or number, we just wanted a good mix. To get it, we reached out to friends to see what they had, and they didn’t disappoint. We got a great mix of wooden racquets, some in great shape, some warped, and at least one without strings. We also got a healthy mix of modern racquets and added Caroline’s old and current racquets to the mix.

We painted two large pieces of masonite (our favorite decoration staple) bright green and nailed them to the wall. I’m not gonna lie, this was a little frustrating since we just repainted the house and covered all of the staple holes from Studio 54. We then used finishing nails to hang each racquet in a sporadic pattern. We finished it off by adding a basket of fresh tennis balls to the front.

The last major selfie station we put together was a balloon arch over the fireplace. We’ve had mixed results with the balloon arch concept so I was a little nervous. We did the full balloon arch with shaped pvc pipe for our prom backdrop, and had really great results. However, when we tried to do a free form balloon “sculpture” up the stairs for the Studio 54 party it was pretty much a disaster. Admittedly, for that one we had just ordered packs of gold and black balloons and decided to wing it. To help ensure success, I ordered an actual kit from Amazon. I was hoping to tie in Caroline’s pink, green, and yellow color aesthetic, but I was finding softer millennial pink, and mossy green combinations. They were pretty, but didn’t really scream “tennis court.” It really came down to pink and white or yellow and white. Caroline went with yellow, which definitely continued the tennis ball theme into the living room. Ultimately, I think the balloon arch came out rather nicely, but it was probably one of the most stressful parts of the party. That was mainly because it suggested that we shouldn’t put it together even 24 hours before the party because the balloons might shrink. This meant that we were waiting until the day of the party which for me is way too last minute for this sort of thing. Good thing we have a balloon pump! Alex ended up putting it together, so I don’t have any helpful hints, except check with the birthday girl on what she really wants for an arch. I thought the half trail up the fireplace was perfect. She apparently wanted a full arch. We can’t win them all.

The final piece of the puzzle was putting together “activities” or generally things for the guests to do. We are way beyond “pin the tail on the donkey” or parental driven relay races, but with guests coming from a wide swath of the high school set (tennis team, color guard, band, youth group, and random friend from Algebra) we wanted to make sure there were activities that would help them blend and not run to separate corners for 5 hours. We started with badminton in the backyard. From the get go we weren’t positive how popular this would be. We figured it would at least attract a few tennis players, or people that follow sports not generally played in the US. When it rained for two hours in the afternoon, we thought well it’s a cute net and a sign. But, we didn’t really think it would garner much interest. We were really wrong on this. At one point during the evening, almost all of the group were outside taking turns playing and cheering each other on. Even as many of the crew returned inside to hang out and play video games there was a contingent that played for most of the evening.

The next activity we added was checkers. I know, the concept of checkers for high schoolers seems a bit young, but it works. We created a board for decoration at Caroline’s Halloween party and it was a huge hit. It gives the less social kids a place to hang out and something specific to be doing. Also, apparently people like to play checkers (the Cracker Barrel may be onto something). We created a giant board featuring our pink and yellow colors, and then cut pink and yellow tennis balls in half for the checkers. Once again, this was a hit and there was a rotating crowd around it.

The final “planned” activity we had was Mario tennis on the Nintendo switch upstairs. I know this turned into a variety of video games and there was a general stream of teens up and down the stairs playing and watching. (Morning after evidence also, indicated someone thought they’d start a game of Monopoly…kind of ambitious.)

What we didn’t plan on may have been the biggest hit of the night. There was a pretty constant contingent of guests hanging out in the living room playing the piano and generally having a sing a long that included a ukulele. The group was clearly having a good time, and I certainly won’t discount it as a possibility at future parties but I won’t bank on it either.

Overall, I would consider Love- 15 a success. If nothing else, everyone that came left in one piece, and my white couch is still white.
***For those of you that don’t remember high school P.E. tennis scores are: Love, 15, 30 and 40. So, the first score will either be Love 15, or 15 Love.